今天分享edius为图片加上翻转效果的详细操作。


有很多朋友需要为图片加上翻转效果,其实很简单的,使用edius这款软件就可以了。下面打字教程网小编就讲解了edius为图片加上翻转效果的操作过程,来下文看一看吧。...
有很多朋友需要为图片加上翻转效果,其实很简单的,使用edius这款软件就可以了。下面打字教程网小编就讲解了edius为图片加上翻转效果的操作过程,来下文看一看吧。
edius为图片加上翻转效果的详细操作
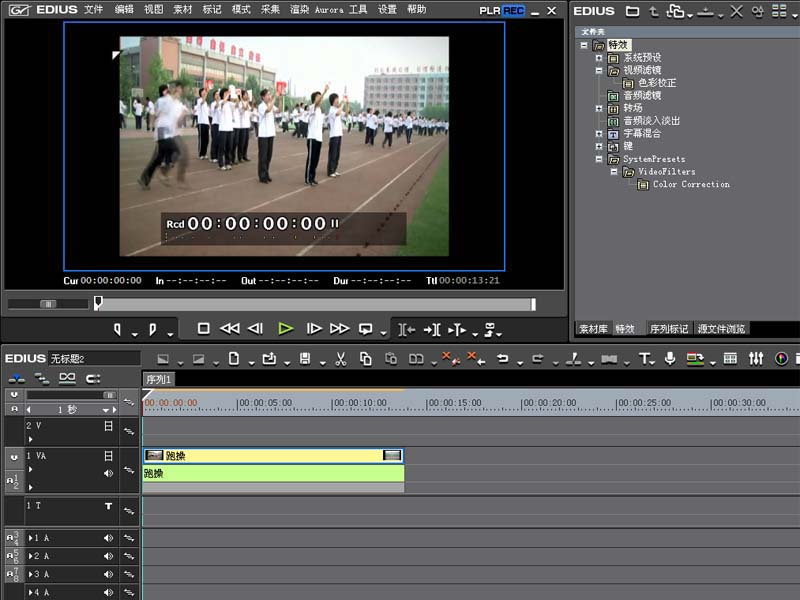
1、首先启动edius6,新建一工程,导入事先准备好的视频素材。
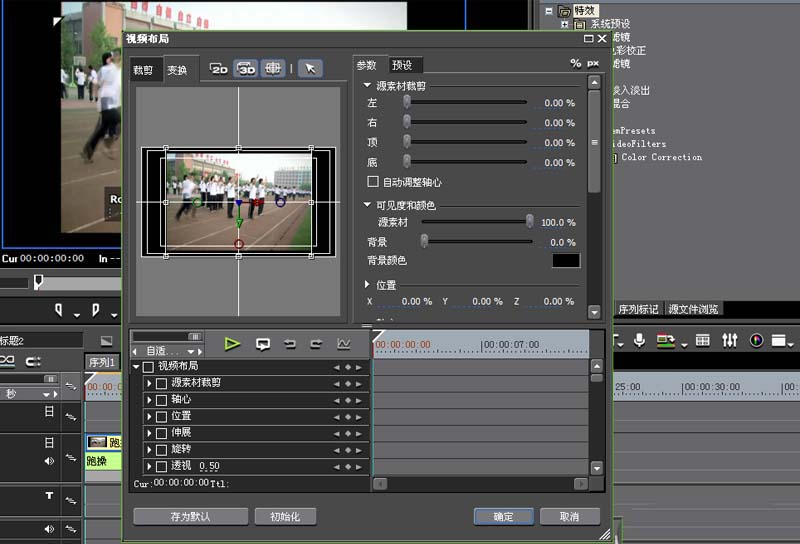
2、双击右下角的视频布局,调出视频布局对话框,切换到3d选项卡中。
3、勾选旋转,设置y轴为90度,拉伸为100%,点击确定按钮,查看效果
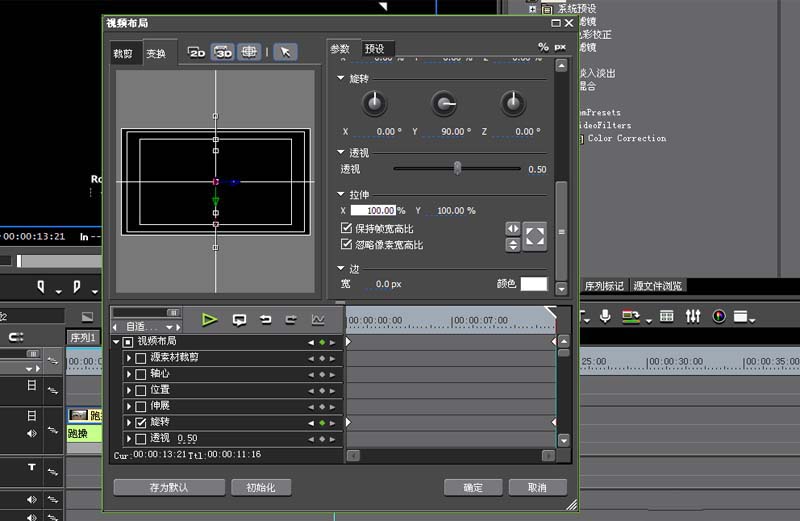
4、采用同样的方法和步骤分别设置x 或者z轴,进行查看效果,选择自己喜欢的效果即可。

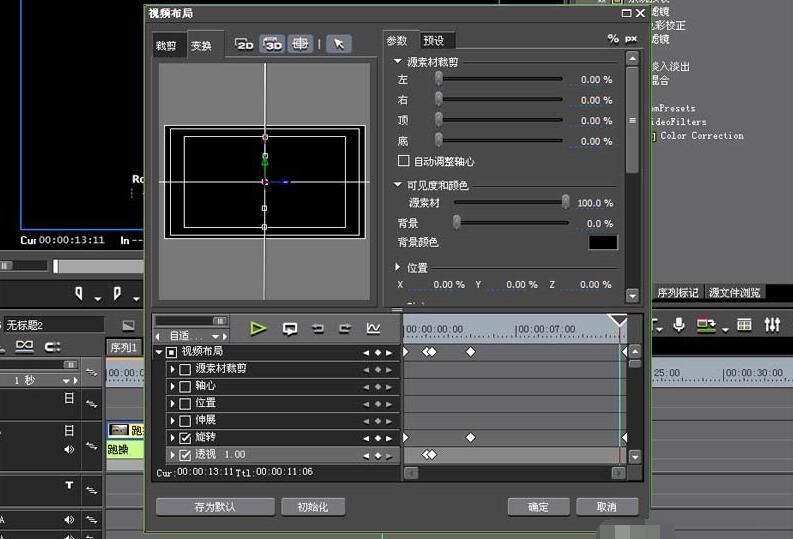
5、为了立体效果更加明显,勾选透视,设置参数值为1.00,点击确定按钮。
6、按快捷键f11,输入名称,选择位置,将文件导出为AVI格式即可。

以上这里为各位分享了edius为图片加上翻转效果的详细操作。有需要的朋友赶快来看看本篇文章吧。
本文由cwhello于2024-10-11发表在打字教程,如有疑问,请联系我们。
本文链接:https://www.dzxmzl.com/6742.html
本文链接:https://www.dzxmzl.com/6742.html