分享ps打造层叠文字的图文操作。

ps各位熟悉吗?本节就介绍了ps打造层叠文字的图文操作,还不了解的亲们就跟着打字教程网小编学习一下吧,希望对你们有所帮助。 ps打造层叠文字的图文操作...
ps各位熟悉吗?本节就介绍了ps打造层叠文字的图文操作,还不了解的亲们就跟着打字教程网小编学习一下吧,希望对你们有所帮助。
ps打造层叠文字的图文操作
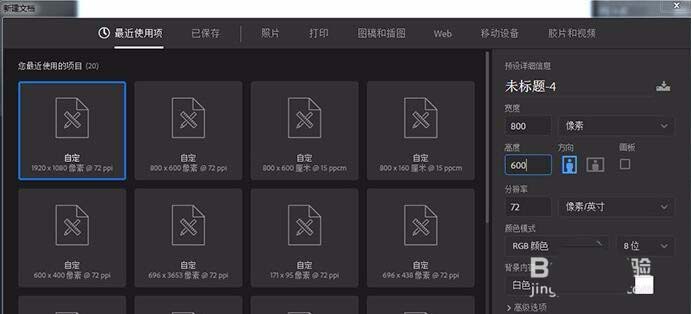
1、我们新建,背景内容为白色的新文件
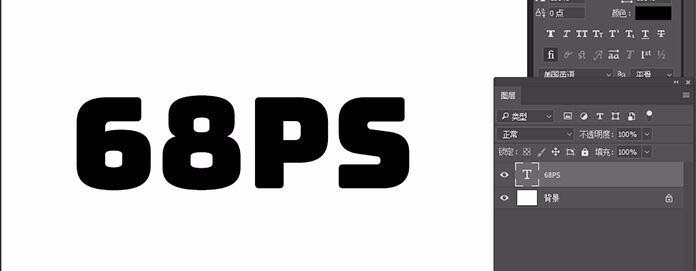
2、输入文字 ,调整字的大小、间距、字体
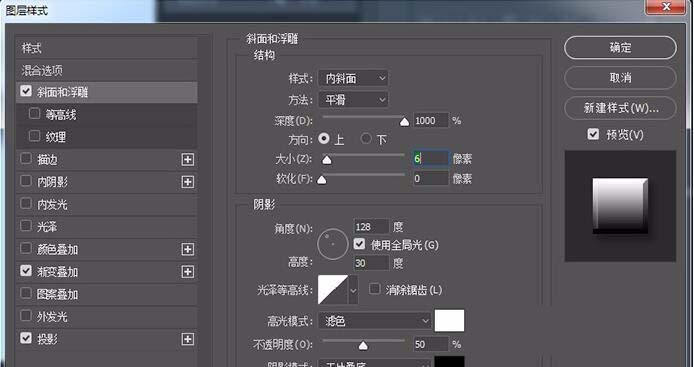
3、转到图层-图层样式,使用以下设置添加斜面和浮雕

4、使用以下设置浙变叠加
5、使用以下设置投影

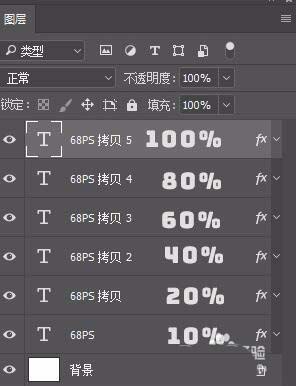
6、复制文字图层5次,把每个图层的不透明度分别设为
7、效果如下图所示

各位小伙伴们,看完上面的精彩内容,都清楚ps打造层叠文字的图文操作了吧!
本文由cwhello于2024-10-11发表在打字教程,如有疑问,请联系我们。
本文链接:https://www.dzxmzl.com/6623.html
本文链接:https://www.dzxmzl.com/6623.html