关于ai设置旋转复制的操作流程。


大家或许不知道ai设置旋转复制的操作,那么今天打字教程网小编就讲解ai设置旋转复制的操作方法哦,希望能够帮助到大家呢。 ai设置旋转复制的操作流程 新建...
大家或许不知道ai设置旋转复制的操作,那么今天打字教程网小编就讲解ai设置旋转复制的操作方法哦,希望能够帮助到大家呢。
ai设置旋转复制的操作流程
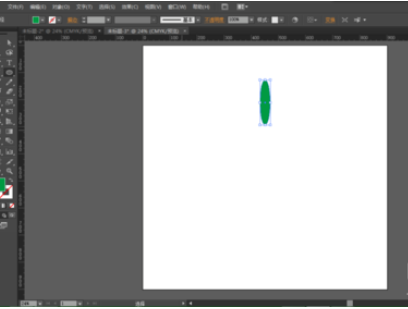
新建文件
使用椭圆工具画一个椭圆。

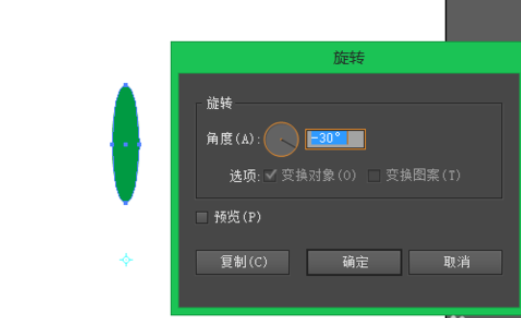
选中图形,选择旋转工具,
按住Alt在图形上找到需要的旋转中心,出现旋转设置面板,设置旋转角度。
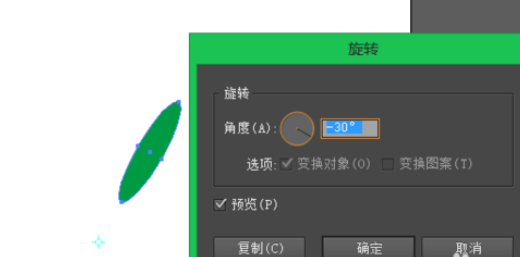
勾选预览,单击复制。完成旋转复制。
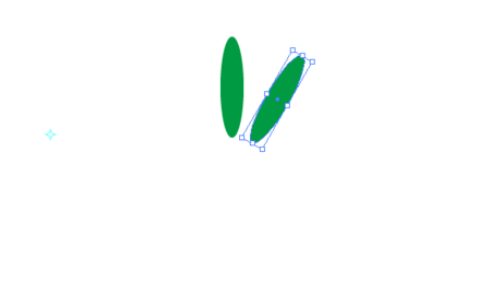
多次按Ctrl+D即可多次旋转复制。

今日就快来学习本文ai设置旋转复制的操作流程吧,相信在以后的使用中一定会得心应手的。
本文由cwhello于2024-10-11发表在打字教程,如有疑问,请联系我们。
本文链接:https://www.dzxmzl.com/5830.html
本文链接:https://www.dzxmzl.com/5830.html