小编教你photoshop里扩散滤镜使用操作介绍。

photoshop这款软件各位熟悉吗?晓得该软件的扩散滤镜吗?今天打字教程网小编讲解了photoshop里扩散滤镜使用操作方法,有需要的朋友一起来学习吧。 pho...
photoshop这款软件各位熟悉吗?晓得该软件的扩散滤镜吗?今天打字教程网小编讲解了photoshop里扩散滤镜使用操作方法,有需要的朋友一起来学习吧。
photoshop里扩散滤镜使用操作介绍
开photoshop软件。
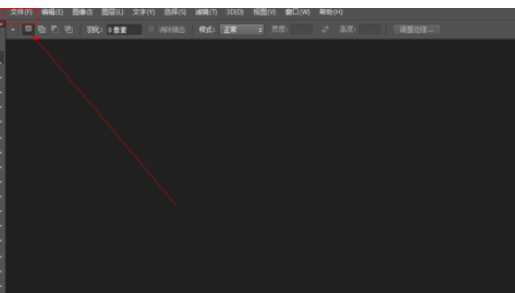
如图所示,我们点击箭头所指的“文件”这一项。
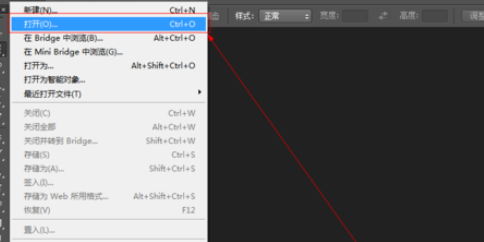
如图所示,在弹出的列表菜单中,我们点击箭头所指的“打开(O)...”这一项。
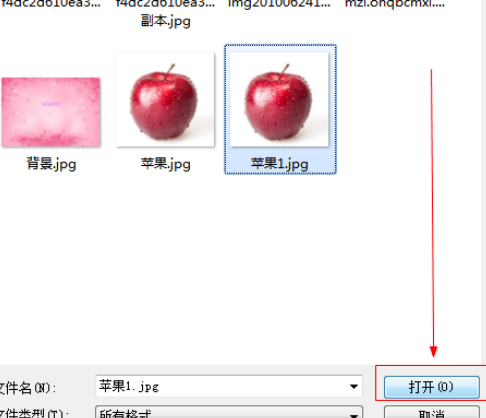
如图所示,我们选择一张图片,接下来我们点击箭头所指的“打开”按钮。
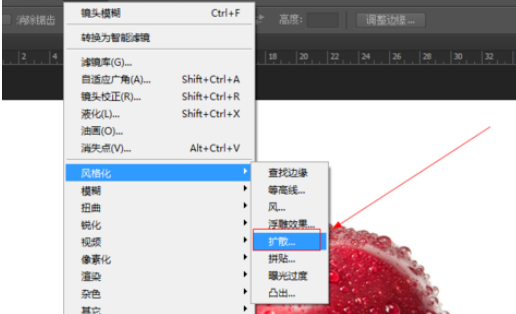
如图所示,点击“滤镜”这一菜单,在弹出的下拉列表菜单中,我们点击箭头所指的“风格化”这一项。

如图所示,在弹出的菜单中,我们点击箭头所指的“扩散...”这一项。
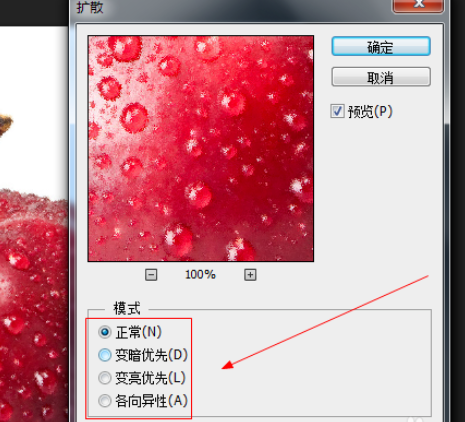
如图所示,在弹出的菜单中,我们调节箭头所指的模式,之后我们点击“确定”按钮。
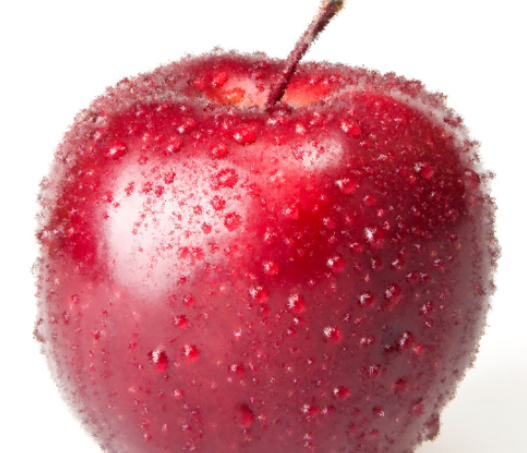
如图所示,我们看到使用扩散滤镜之后,我们看到苹果变得有了扩散的效果。
以上这里为各位分享了photoshop里扩散滤镜使用操作方法。有需要的朋友赶快来看看本篇文章吧。
本文由cwhello于2024-10-11发表在打字教程,如有疑问,请联系我们。
本文链接:https://www.dzxmzl.com/5817.html
本文链接:https://www.dzxmzl.com/5817.html