说说photoshop制作描边文字的操作流程。

本文是为大家讲解photoshop制作描边文字的相关操作的,想要了解的就来学习photoshop制作描边文字的操作方法吧,一起去看看吧,相信对大家一定会有所帮助的哦。...
本文是为大家讲解photoshop制作描边文字的相关操作的,想要了解的就来学习photoshop制作描边文字的操作方法吧,一起去看看吧,相信对大家一定会有所帮助的哦。
photoshop制作描边文字的操作流程
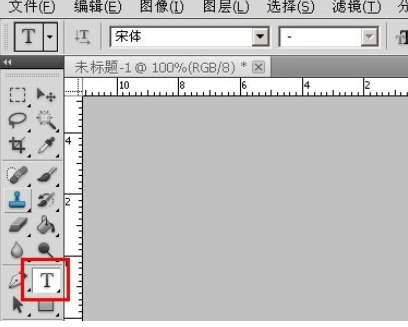
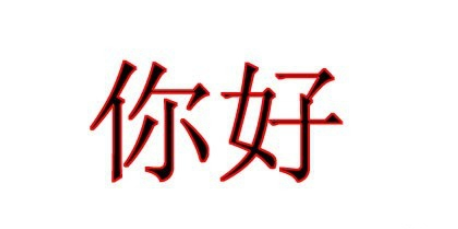
在photoshop中新建一个空白文档,在工具面板中,选择“横排文字工具”图标,单击空白文档,输入文字,如“你好”。

设置文字的大小(如红色框内),可以下拉选择文字大小,也可以直接输入适当的数字。
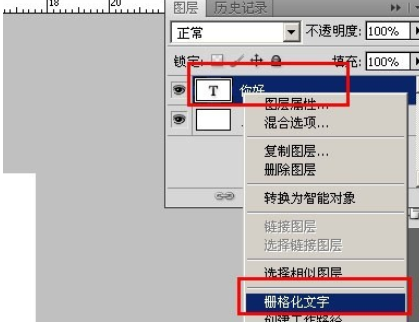
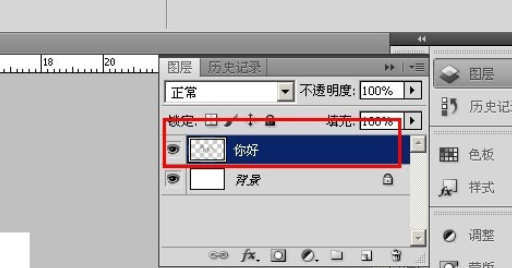
打开图层面板,选择文字图层,右击“删格化文字”,则文字图层会变成普通图层。
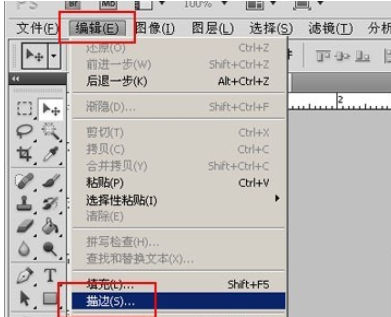
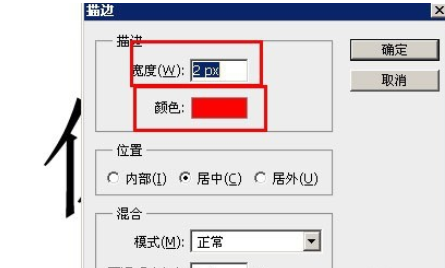
选择“编辑”菜单——“描边”,在打开的描边面板中,设置边的宽度大小,及颜色。
如下是效果图。
以上这里为各位分享了photoshop制作描边文字的操作流程。有需要的朋友赶快来看看本篇文章吧。
本文由cwhello于2024-10-10发表在打字教程,如有疑问,请联系我们。
本文链接:https://www.dzxmzl.com/5534.html
本文链接:https://www.dzxmzl.com/5534.html