我来教你photoshop制作螺线特效的图文操作。


想了解photoshop制作螺线特效的相关操作吗?下面就是打字教程网小编整理的photoshop制作螺线特效的图文操作教程,赶紧来看看吧,希望能帮助到大家哦! p...
想了解photoshop制作螺线特效的相关操作吗?下面就是打字教程网小编整理的photoshop制作螺线特效的图文操作教程,赶紧来看看吧,希望能帮助到大家哦!
photoshop制作螺线特效的图文操作
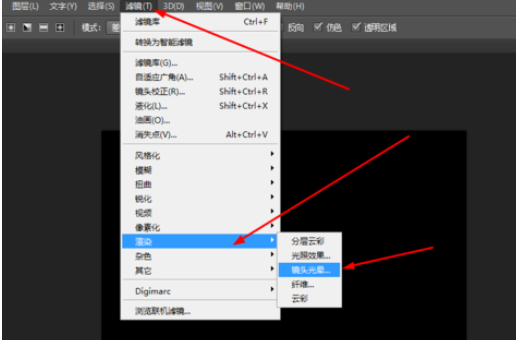
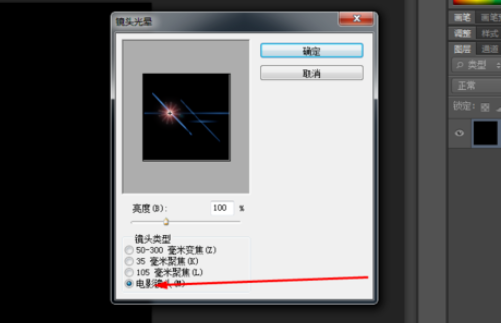
在ps软件中,新建一个800*800的文档,填充黑色,然后在滤镜中添加镜头光晕,如图所示
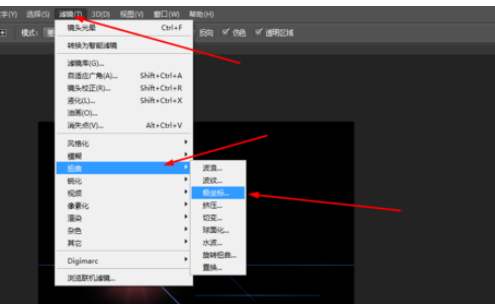
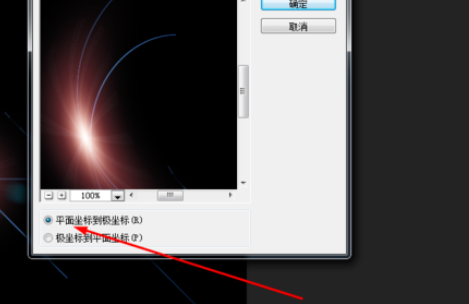
然后在滤镜中添加极坐标,如图所示
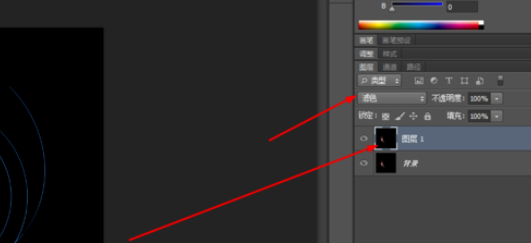
然后复制一个图层,把图层的模式改为滤色
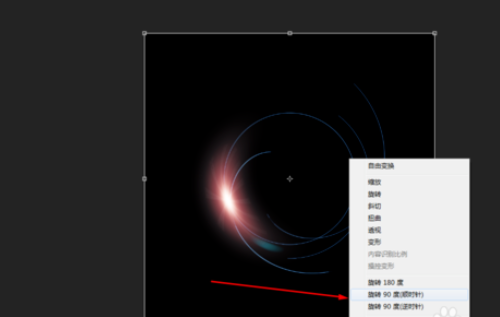
再按ctrl+t,顺时针旋转90度,如图所示
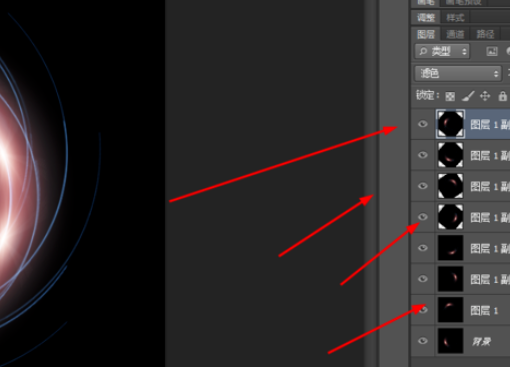
按照第4的步骤做下去,如图所示
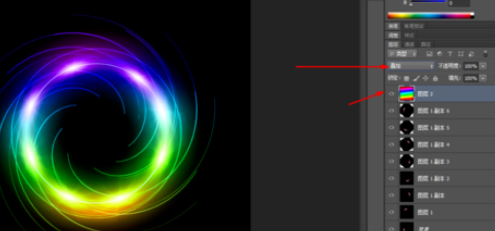
新建一个图层,拉一个五颜六色的渐变,把它的模式改为叠加,如图所示
以上这里为各位分享了photoshop制作螺线特效的图文操作。有需要的朋友赶快来看看本篇文章吧。
本文由cwhello于2024-10-10发表在打字教程,如有疑问,请联系我们。
本文链接:https://www.dzxmzl.com/5458.html
本文链接:https://www.dzxmzl.com/5458.html